
The part 1 photo below showed that the Atlas RS-1 cab had been shortened to the length needed.
Click to enlarge photos

The side to side curvature of Atlas roof has radius that is to sharp, a new roof needs to be made that will match the curvature of DEY-2. Below the entire cab roof has been removed, not much remains of the Atlas cab halves.

A scratch built cab was considered at this point, but the thick rigid plastic that remains from the Atlas cab still offers a strong understructure with defined corner posts for the window area and the ability to interlock with the Atlas hoods using the original tabs under front and rear cab windows, therefore the parts were retained for re-siding.
A new base plates were made for the cab, this helps in aligning the two halves together for gluing and also raises the cab to the same height as the long hood that was raised in the beginning of part 2. This photo also shows the retained original interlocking tabs that will locate the cab to the long and short hoods.

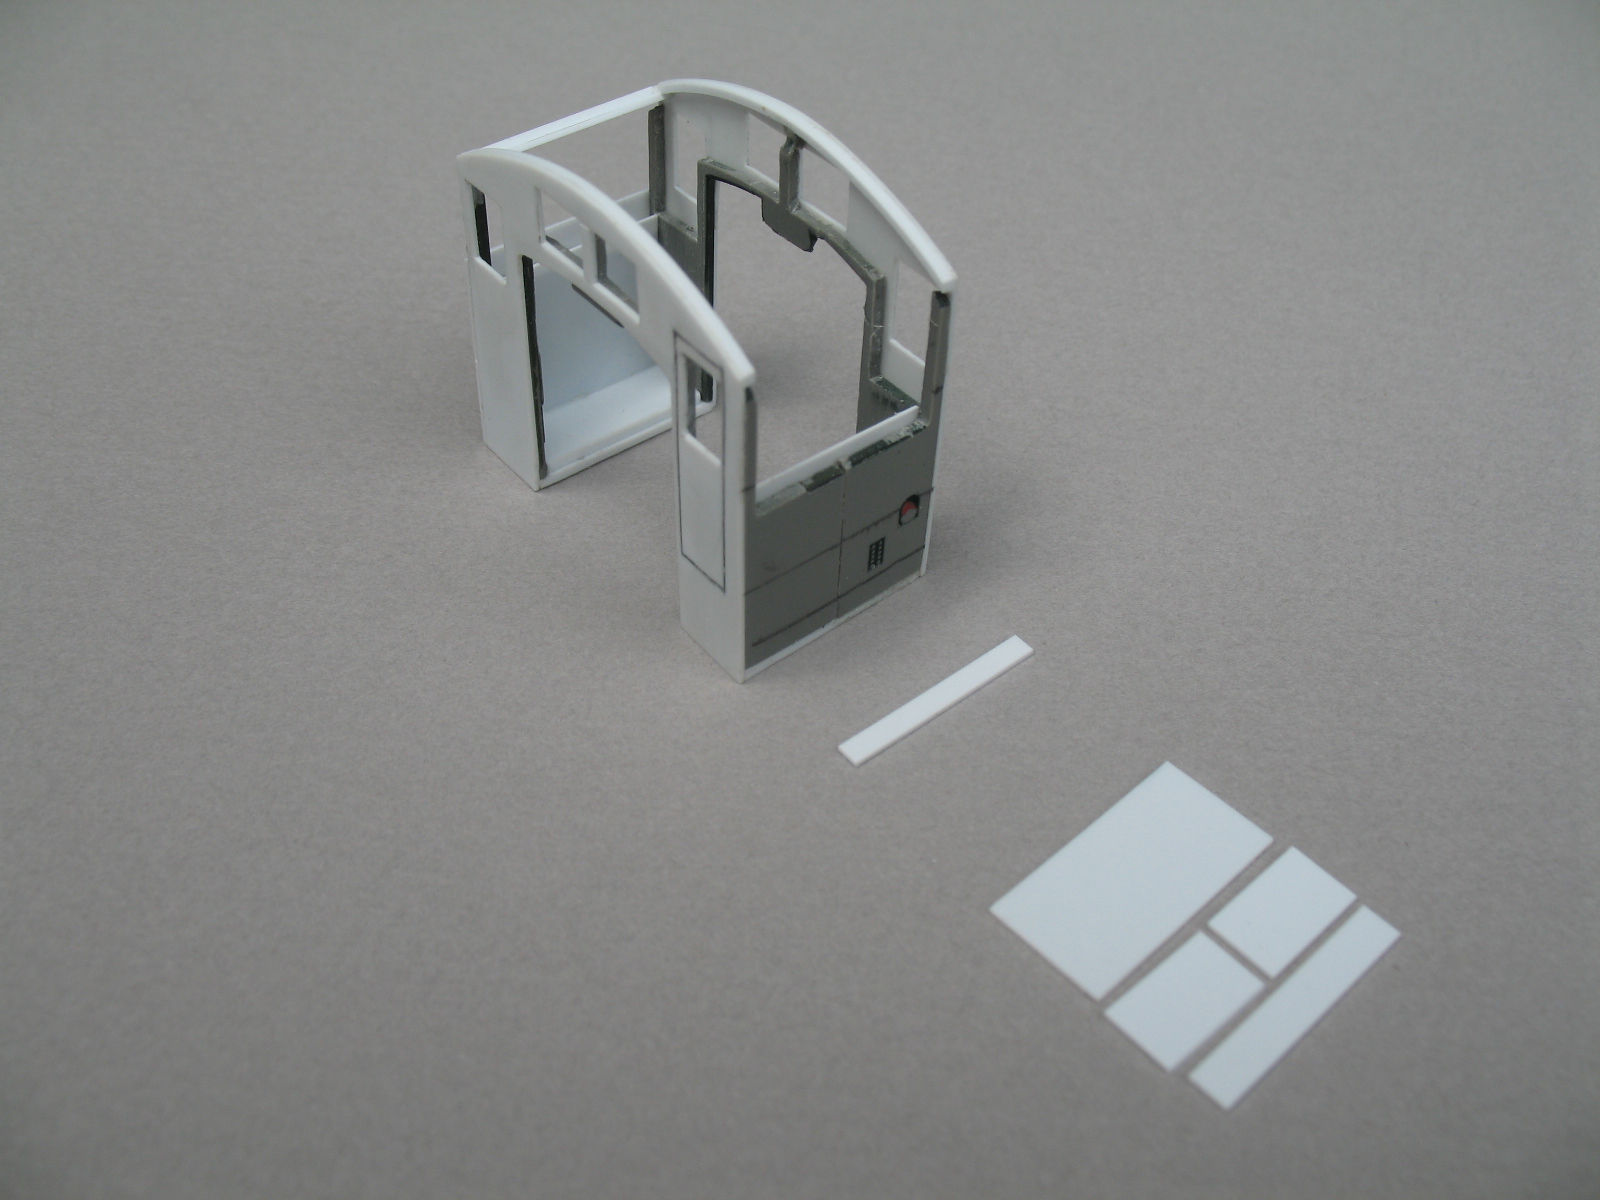
Below are the two pieces that will re-side the front and rear of the cab. The curvature of the cab roof was traced from the GE drawing. The windows were marked and cut out, the gap surrounding the doors was scribed into the pieces.
A styrene template was made by tracing with a scribe the front panel of the long hood completed in part 2. A centerline was marked on the template then matched with the centerline marked on the pieces below to accurately cut out the opening for the cab to slip over the re-sided hoods.

A gluing surface that follows the correct side to side roof curvature will be needed to affix the new roof at the front and rear of the cab. Below styrene strips wide enough for that purpose are glued to the inside top of the front and rear cab pieces following the curvature that was cut into these pieces and held down with weights till cured. When cured the strip was cut off flush with the cab sides.

Here the new cab ends have been glued to the under structure.
The pieces to re-side the cab sides are also showed below. Note that a piece of styrene has been glued to the inside of the cab sides, this reinforces the joint were the two cab halves were rejoined and glued.
Here the side pieces are glued in place. The piece glued in place at the top of the side window opening is tilted to match the curvature of the roof, it will serve as a gluing surface for the roof panel were it meets the side of the cab, the piece glued to it directly underneath is a gluing surface for the top of the window frame.

The next photo shows the window openings in place and the pieces necessary for that below.

This photo and the one above show the completed cab without the roof panel.

Below is the roof panel, it is also made from .010" styrene. The side to side length of this piece including the downward bend on both sides was figured out before hand. The curvature of the cab roof overhang at both the front and rear of the cab was also figured out before hand. The overhang curvatures were marked on the panel with a French Curve then cut into the roof panel with a very sharp pair of scissors before the side to side curvature was worked into the panel. This overhang curvature can be seen on the finished model and on the drawing in the opening photo in part 1.
The side to side curvature was worked into the piece till it would hold the correct radius by moving it back and forth over a smooth metal rod that was clamped into a vise, much like you would hold a rag and run it back and forth over the top of a shoe when polishing. After the curvature was set into the panel, the downward bends over side windows were bent from the inside. Laying the panel upside down the edges of two single edge razor blades were used to make bends, one blade to hold the panel down on a flat surface at the bending line and the other to bend the material up at the bending line.
The roof was not permanently attached the cab until the paint work was completed and the glazing installed.

Next post will look at the short hood.
No comments:
Post a Comment